Thursday, July 20, 2017

Friday, May 05, 2017


Saturday, February 14, 2015

Monday, May 06, 2013
Pottery "Bubble" Glazing

Bubble Glazing with the kids this week. Mix soap and water with underglaze. Darker colors on white clay show up best. Use a long straw to blow into the tray of soaped up underglaze, until it builds up plenty of bubbles and suds. Then, lower the plate into the bubbles and pop them all over the surface of the plate. Be careful not to lower it all the way into the underglaze mixture. Clear glaze over the top and fire.
Tuesday, March 19, 2013
Angry Birds

Kids classes at my house, we made angry birds.
Clay formed around paper balls, decorated.
Students love to "surgically" remove the paper when they are
leather hard.
Add a slot in the back, and it's a bank!
Add a slot in the back, and it's a bank!
Wednesday, March 13, 2013

Wednesday, June 13, 2012
Campfire Pottery
My last 2 campfirings yielded very different results. I decided it might be fun to bust up a pretty budlight platinum bottle - very blue- add some borax and see if I could get it to melt.
Welllllll... it melted, a little, in chunks. Fused some. But, the mule team borax melted in a nice puddle in one of the pots. Glaze, actually. But, the pots cracked completely and fell apart. No good.
So, I decided that maybe if I wedged (mixed for you nonpotters) some borax into the clay, it might help it to melt at a lower temp- this clay is very sandy and kind of short (cracky) so improving that would be good, but it wasn't as much my motivation as trying to get the pots to crack less in the firing.
I'm pleased that mixing in the borax actually did improve the workability of the wet clay, which was a pleasant unexpected bonus. Too much borax actually made it too sticky and wimpy, so there is a limit.
The last firing I did yielded some really beautiful orange pots with only a couple of cracks in the rim, and I was pretty aggressive in shoving them into the coals. I preheated the pots for about an hour at the edge of the fire, and then just shoved them under the logs. They weren't even buried in coals, so I'm wondering if there was a temp. difference which caused the cracks. I am, however, pretty pleased with the results.
My next plan is to mix some salt along with the borax into the clay and see what happens. Stay tuned. Camp starts next week!

Welllllll... it melted, a little, in chunks. Fused some. But, the mule team borax melted in a nice puddle in one of the pots. Glaze, actually. But, the pots cracked completely and fell apart. No good.
So, I decided that maybe if I wedged (mixed for you nonpotters) some borax into the clay, it might help it to melt at a lower temp- this clay is very sandy and kind of short (cracky) so improving that would be good, but it wasn't as much my motivation as trying to get the pots to crack less in the firing.
I'm pleased that mixing in the borax actually did improve the workability of the wet clay, which was a pleasant unexpected bonus. Too much borax actually made it too sticky and wimpy, so there is a limit.
The last firing I did yielded some really beautiful orange pots with only a couple of cracks in the rim, and I was pretty aggressive in shoving them into the coals. I preheated the pots for about an hour at the edge of the fire, and then just shoved them under the logs. They weren't even buried in coals, so I'm wondering if there was a temp. difference which caused the cracks. I am, however, pretty pleased with the results.
My next plan is to mix some salt along with the borax into the clay and see what happens. Stay tuned. Camp starts next week!

Tuesday, May 01, 2012


I am very pleased with my new lace pottery dinnerware. Each piece came through the glaze firing beautifully. This tableware is thrown on the potter's wheel and made from food safe clay and glaze. They'll be tested in my kitchen before I offer these in sets for sale. This evening, they passed the steak test. yum.
Tuesday, April 17, 2012
Lace Pottery Thrown on the Wheel
 I'm so excited about these I couldn't wait until they were fired to share them. I made a set of battenburg lace printed plates on the wheel. I love how this dogwood pattern takes waterfall brown glaze- the glazed plate shown is slab built, but I wanted to do them on the wheel. I'm pleased so far. If they turn out well, the first set is mine!
Monday, April 09, 2012
Primitive Back Yard Firing #2-

No cracks on this one- Sandy clay, right from the ground, no additional sand added.
Wednesday, April 04, 2012
Primitive Firing- Making Pottery Without a Kiln
 Success! I fired my "homemade" clay-(see my previous post for directions to dig and screen your own clay)- in my little backyard fireplace. I learned so much and it was really fun so I plan to do it again soon. Besides, I've got 15 lbs of clay to play with.
 If you try this, BE SAFE. Two of the pots exploded- not a project for kids without close adult supervision, and safe practices- protective clothing, face gear, tongs, gloves- you get the picture.
My initial feelings after reading a few articles and having a few failures was that moisture was my enemy. That seems to be only part of the issue. Thermal shock also matters big time. The 2 pots that survived had alot of sand in the clay- some of which came from the ground already in the clay, some of which I added to one of the pots. Too much sand and the clay is "short" or cracks easily as you work it. The pots that made it were kind of cracky, but I could still throw the clay on the wheel. I will add ball clay to my next batch (to make it more plastic) and see what happens.
Another thing I learned was to be patient in preheating the pots. I did kind of just put a couple right into the coals, and they blew up within 5 minutes. So, the others were put along the side of the fire and gradually moved in over probably an hour to 90 minutes time. So, I guess patience is my enemy..live and learn.
Here's a link to a slideshow with more pics and notes on the process: http://www.youtube.com/watch?v=K75WSPRqcU4&context=C4d56c4dADvjVQa1PpcFMLykouOR9nAv5Ciy6rSmO-AaNmzT-fMeU=
Sunday, April 01, 2012
Pottery "From the Ground Up"
 I have recently become interested in making pottery without using a kiln. This summer I am teaching a pottery class at Camp Asbury titled "From the Ground Up." The focus is on making tools, preparing clay from the ground, and primitive firing.
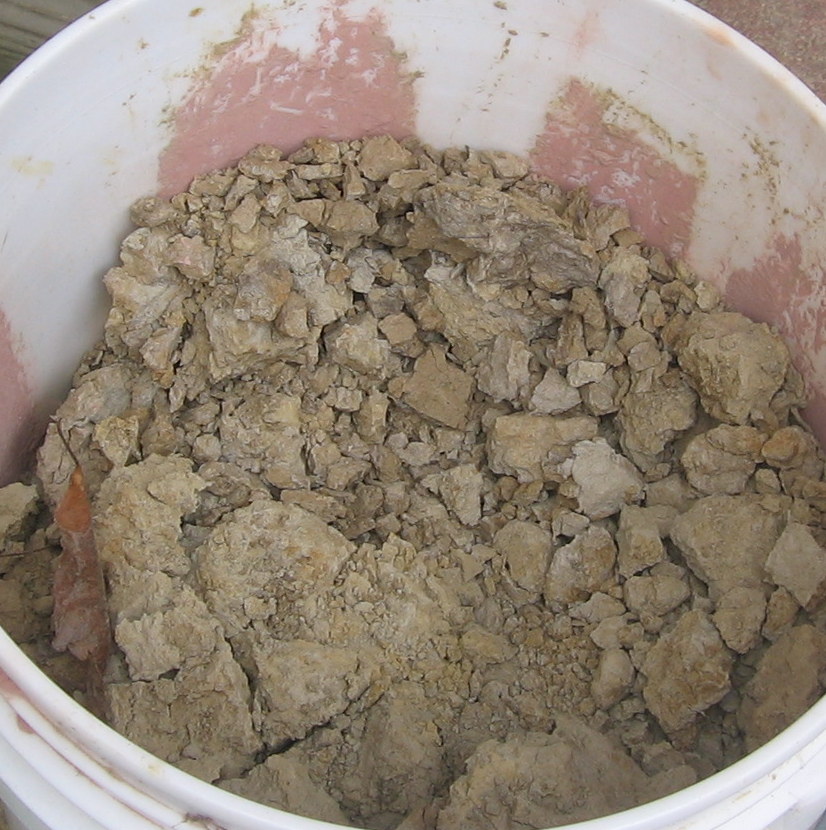
Step 1. Clay. Easy to find in Ohio, just dig a hole and it's there. Step 2. Let it DRY. Completely. Then, add water and it will disintegrate and slake down into fine mud. Mix it up, and screen through an old metal window screen to remove, sticks, stones, stuff you don't want in your clay. Step 3. Dry your slurry into workable clay. This can be done by putting the slurry in an old pillowcase and leave it out on the concrete. I have a plaster top wedging table where I dry my clay. Hardi backer cement board or old drywall would also make a good surface. NOTE: if you use a plaster surface, DO NOT get plaster into the clay.
Once the clay is a workable consistency- test it by squishing it up until it feels right. Then, you can make some pinch or slab pots from the clay. I made 4 pots for my first test firing.
Pot (A) is homemade clay with white stoneware mixed in and "marbled."
Pot (B) has brown stoneware added, because I felt the clay right from the ground was a bit cracky, or short.
Pot (C) has some sand added to the clay, which made it even more cracky.
Pot (D) has nothing added and is thrown on the potter's wheel.
I tried to keep the pots even in thickness, no thinner than 3/8" - 1/2". Also, I have placed the pots in my kiln to preheat at 200 degrees for several hours. I have never successfully fired green clay in an open fire without cracks and explosions. I'm convinced that moisture is my enemy. Smarter people than I have been doing this for thousands of years, so what's my problem?? My attempt to be SURE that the pots are really dry is to preheat them for several hours in my kiln. This could also be done in an oven.
Keeping my fingers crossed and hoping to have pics of fired, undamaged pots later!


Thursday, June 30, 2011
This is my latest, and best, barrel fired pot to date. I fired it while working with some kids at Camp Asbury. I usually use primarily salt and miracle grow in newspaper saggars, but this time I used some commercial fertilizer pellets that they had on hand at the camp. I'm really pleased with the results. The pot is now in the student/faculty show at Valley Art Center.
 I had some crackling and peeling of the terra sigillata- so I intend to change my recipe and try applying it thinner. Also, there is a bit of salt scumming on the surface of the pot. Too much salt?
The color, though, is right where I want to be.
 I had some crackling and peeling of the terra sigillata- so I intend to change my recipe and try applying it thinner. Also, there is a bit of salt scumming on the surface of the pot. Too much salt?
The color, though, is right where I want to be.
Saturday, May 28, 2011
Barrel Firing Again..
This is one of the pots I fired last time in the barrel. Lots of smoking because I kept the fire covered with a grill cover- not alot of color because I skimped on salt and miracle grow- I didn't see any real effects from the corn husks and so I didn't go through the drying and brining this time..
Here is a pot from this firing- colorwise, my favorite. I only bisqued these pots to ^019- they were very soft and brittle- I will go higher next time with the bisque. Also, the terra sig crackled and peeled in some places, and this pot spalled. I used alot more miracle grow, table salt, and aquarium salt in the newspaper saggars with pine needles and tiger grass. I will apply the terra sig more thinly next time- and the spalling???? The only thing I can think of is that the aquarium salt was kind of wet when I put it in the saggars, maybe the pots absorbed enough of the moisture to develop this problem.
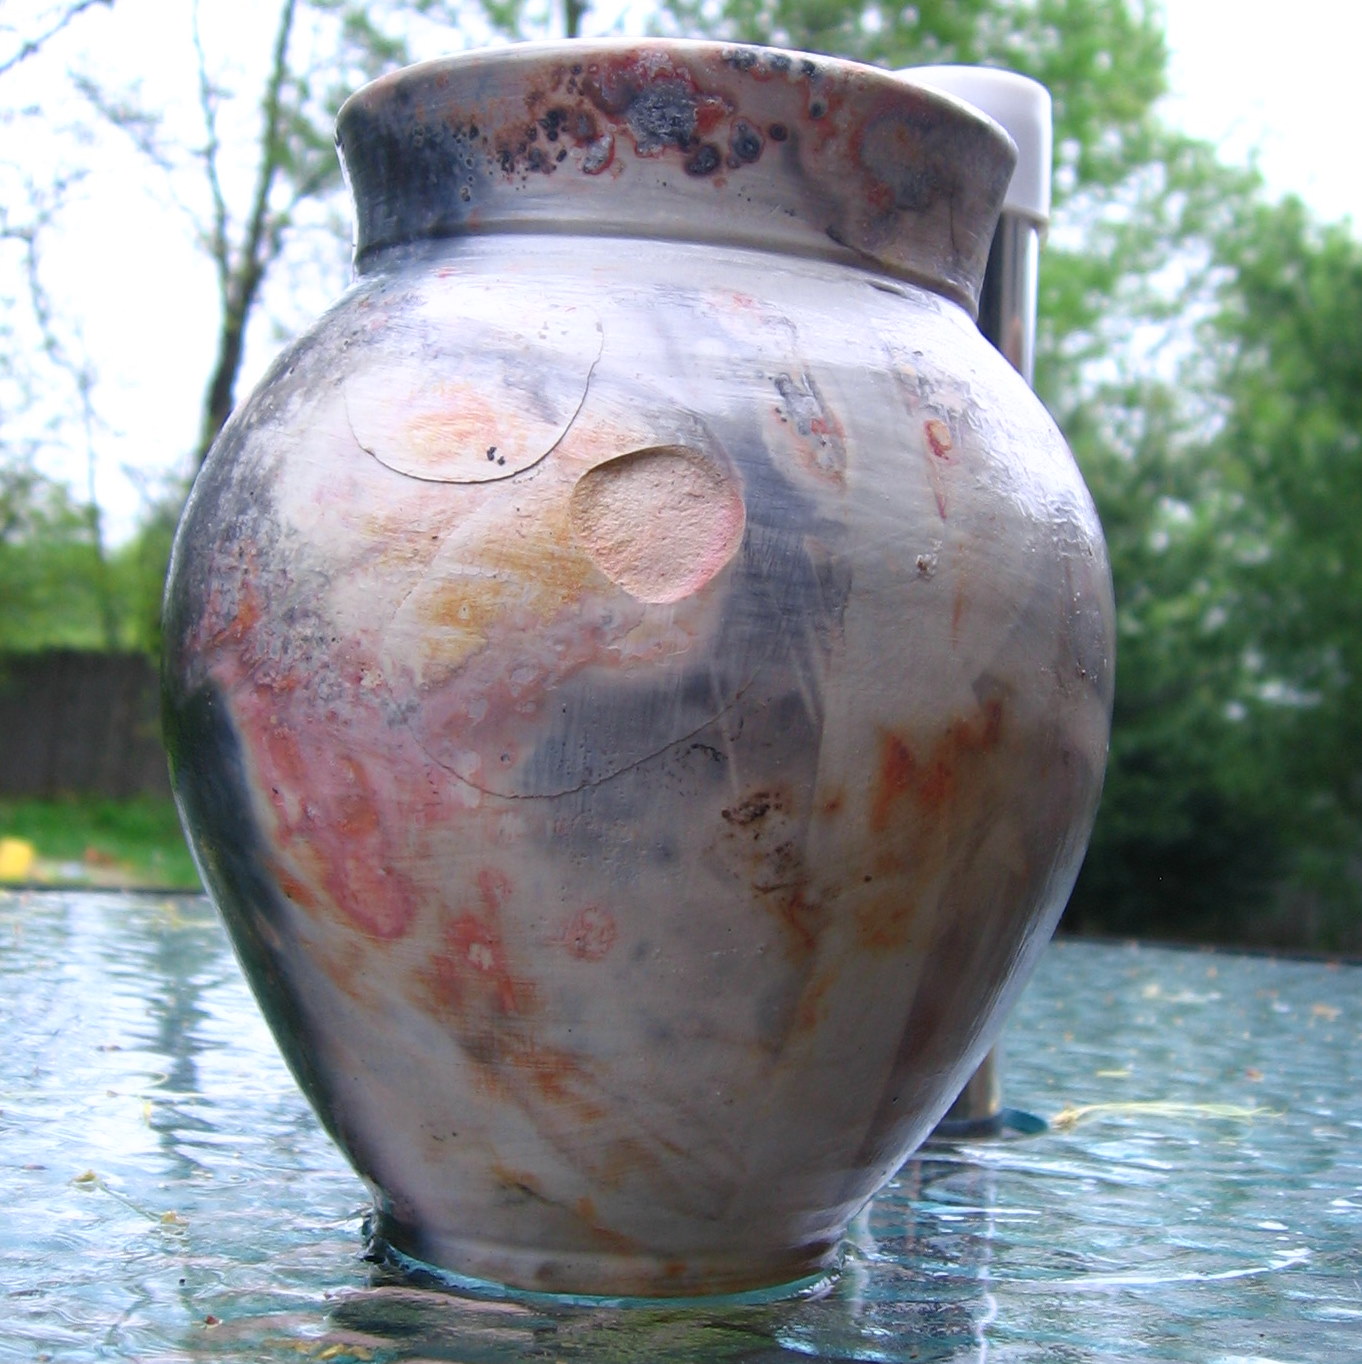
This pot ended up with a chipped rim and crackled sig- a little spalling, but much more color than my first barrel firing- I fired this time without covering the barrel at all, so I believe there is alot less black because of it. I did have to use a leaf blower to get the shavings/horse bedding to light- I may loosen things up a little bit with more straw next time. Bulk of the firing took about 5-6 hours.
 This pot is from the first firing also- lots of smoky black, enhanced by furniture paste wax. I also tried Rain-X car wax- it polished well, but the stuff dries blue, so if there are crevices you can't get into with a rag, it leaves marks on the pot :( So, paste wax it is..

 This pot is from the first firing also- lots of smoky black, enhanced by furniture paste wax. I also tried Rain-X car wax- it polished well, but the stuff dries blue, so if there are crevices you can't get into with a rag, it leaves marks on the pot :( So, paste wax it is..
All in all, I was pleased enough with the colors in the firng that I definitely will do it again. I also tried some china painting on some of the pots, but I did not get enough heat to set the china paint in some spots. I won't prefire the china paint because of the lead- I will not contaminate my kiln. It's got potential, I just need more heat.
On another note, I did get a small freebie kiln- I think there may be raku in my future.

Wednesday, May 18, 2011
Menorah Park Pottery

 Pots made recently by the seniors at Menorah Park in Beachwood. I have the best time working with these folks. Hand built, textured with stamps and fabrics, fired to ^6.
Tuesday, August 24, 2010
Barrel Firing

About 2 years ago I had pots in a group pit firing and got some good results. No place to dig a pit at my place, so I decided to try barrel firing. A recent video on Ceramic Arts Daily by Sumi also got me "in the mood" to give it a try. Here are some pots I made using a few different types of clay I had on hand, with terra sig on them, bisqued to ^019.
The terra sig. recipe I used is from Clayart.
500g OM4 Ball Clay

1000g EPK
14 cups water
2 tsp Trisodium Phosphate
2 tsp Trisodium Phosphate
Let it settle for a few days, siphon off water on top and about the top third of terra sig. This is white terra sig. You can make different colors by adding stains and oxides. I may get to that if my firing pleases me.

As for the stuff to color the pots, I followed Sumi's advice. I'm using alot of table salt, dried coffee grounds, horse stall bedding brined and dried corn husks- lots of those from eating great corn this year! I did have alot of luck with newspaper saggars in the pit firing, and since I haven't saved absolutely tons of stuff, I will use these items in my newspaper saggars. Also, I have used Miracle Grow and copper oxide in the past, so I'm throwing that in, too.
Figuring out how to dry the coffee grounds and husks without bugs galore was tricky, but a baby pool and stroller cover came in handy. Now I know why I never got rid of this stuff! A few days in the sun and we're good to go. 


I loaded the kiln yesterday, but it was kind of rainy, so I will fire today. There are holes in the bottom of my barrel and some bricks and a grate- I decided to leave the very bottom empty for air flow...no big reason. I layered paper, wood shavings, horse stall bedding, salt, miracle grow and saggared pots- 2 layers, about 9 pots in all. Wish me luck.
Sunday, May 30, 2010


I needed pots... fast. Brisk sales at Log Cabin Gallery left me, let's say, "inventory challenged."
Fortunately, mother nature cooperated and I had pots sunnin' with the peonies.
They are now fired and you can find these and more for sale at the Log Cabin Gallery in Peninsula, Ohio. Berry bowls, serving bowls, platters and bunches of mugs-two firings I was particularly pleased with. Gotta love it when a plan comes together!

Sunday, May 02, 2010
A pot of a different color

This happened to me several years ago, in my old kiln. I messed up a cooling cycle and got my Waterfall Brown to turn red. After talking with one of the authors of "Mastering Cone 6 Glazes," I found that just refiring this glaze to bisque temp turned it red.
Not so in my new kiln. Until my most recent firing. In an attempt to save a slow cooling cycle, I turned it back up from 1227 F to 1800 and cooled normally. Red!
Actually, a kind of brick, orange red. Not so impressive. So, I stuck 'em back in the kiln and refired to ^6 to see what would happen. They darkened up and became a much nicer color, with all kinds of surface variation that I kind of like. After flipping out a little that I now have 4 place settings of tableware that don't match anything, I decided that maybe this is worth pursuing. Besides, I've been trying to get my iron red glazes to work out in this kiln with no success until now. Happy accident.
Tuesday, October 21, 2008
Firing your own pottery, You Brave Soul
 Careful. It's addicting.
So, you've acquired a kiln from Great Aunt Minnie who made the cutest little Christmas trees and poodle figurines, and you'd like to try your hand at moving and firing the earth. Electric kilns are not rocket science, and you can learn to fire one, but safety is very important since you're playing with a couple thousand degrees, and the potential of getting zapped severely. Also, kiln fumes can be toxic, and glaze chemicals can be poisonous..Oh, and then there's silicosis from overexposure to clay dust... (Still with me?) This isn't to scare you off, it's just to let you know that there are pretty important things to know concerning life, limb, and clay.
While I am not an expert on the whole safety thing, I can get you started on the quest for kiln safety. The good news is, the subject is very searchable online- here's a decent basic discussion to get you off and searching: http://pottery.about.com/od/safetyinceramics/tp/kilnsafe.htm
Also, get an electrician to install your kiln- preferably not in the house. If your kiln is used, many manufacturers have owner's manuals either online, or they will send you one. Just contact them with the model and serial # on your kiln. There is usually a plate on the outside jacket of the kiln with this information.
Ok- assuming you've gotten your kiln safely installed, and you've made a few pots, let's bisque!
Bisque is fired clay without glaze. Generally, you do this first firing because it makes the ware strong enough to handle while you are glazing. Also, it is a low firing, so that the clay is porous enough to absorb your glaze. Be sure your pots are completely, totally dry. Moisture in the clay, especially if it's thick (kids love to build thick) will blow up. It's really not the air bubbles, it's the wet. kaboom! A good rule of thumb is this- if the clay feels cool to the touch, it's probably slightly wet. Touch it to your cheek- if it's as cool as you are, wait.

What is all this stuff I got with my kiln, and what do I do with it? : shelves, stilts, kiln wash, cones. The round or hexagonal things you got with your kiln are shelves.
The.... well, "stilty" things you got, usually a few different heights, are stilts.
Kiln wash usually comes in powdered form, and you add water until it's like cream, and paint it on ONE SIDE of each shelf. This helps you to remove glaze runs and drips without ruining the shelf. Important.
Here is an explanation of what cones are and what they do.
Can we load yet? Ok, here we go. The pic of the shelves and stilts is great because it sort of shows them in action. Start with some really short stilts and a full shelf at the bottom of your kiln. You want to raise the first layer of pots up to the first row of elements (those twisty coiled wire things all around the kiln.) Also, it's good to put your bottom layer of ware on a shelf, because you want to protect the bottom of the kiln from glaze drips. (when we get that far.)
Next, choose stilts that are higher than your tallest pot. Stack a couple of stilts if need be. Three stilts to each shelf will support it well. Y'know, the tripod thing. Add shelves, more ware and stilts- also add a conepack in at least one place in the kiln- near a peephole is good so you can check your firing, and stop the kiln if you must before the kiln sitter trips.
KILN SITTER?? What? - It's the thing sticking out of the side of your kiln. Inside, there's a porcelain tube, and some prongs. You'll put a small cone on the prongs. Outside, there's a lever that falls to shut off the kiln when the cone melts. Read more here.
Finally, my friends, (do I sound like McCain?) at long last, it's time to fire the dang thing. Close the lid- or, prop it open a little if you're afraid your ware might not be completely dry.
I'm going to assume that Aunt Minnie's kiln is older, and it has switches-not a computer controller (whole'nother article.) These switches work pretty much like a stove. Here is a good, conservative schedule to follow when firing a bisque. Follow the article to the bottom. Basically, it's low for an hour, then gradually turn the thing up over the next few hours until you are on high. The kiln sitter should shut off your kiln, providing you have it adjusted right, at the right temp. A bisque should take anywhere from 8-10 hours, depending on how slow you go and how old / worn your elements are. Any longer and there's a problem with the kiln- a discussion for another time.
Let the thing cool for at least a day- then open, unload, and start thinking about glaze!
So, if after reading this, you're thinking "the kiln gods aren't welcome at my house," -fear not! Join a local art center, audit a college class, or pay a potter (in NE Ohio, that would be me) and leave it up to the crazy people.
Questions? I'm sure there's something I didn't cover, so comment here or email me at sheaclaypottery@gmail.com

Saturday, October 18, 2008
Ok, so Rockerchic says I have to blog today..


But, it's autumn here in NE Ohio, and I would much rather be out in the leaves with the kids! ...and the dog.
So, who in the big H is Rockerchic? Check her out!
I did make pots all morning, so I earned an afternoon in the sun-
Subscribe to:
Posts (Atom)